... Trees — redwoods, live oaks or blossoming fruit trees — are usually considered sturdy citizens of the sun-swept peninsula south of San Francisco, not criminal elements. But under a 1978 state law protecting homeowners’ investment in rooftop solar panels, trees that impede solar panels’ access to the sun can be deemed a nuisance and their owners fined up to $1,000 a day. The Solar Shade Act was a curiosity until late last year, when a dispute over the eight redwoods(a k a Tree No. 1, Tree No. 2, Tree No. 3, etc.) ended up in Santa Clara County criminal court....
http://www.nytimes.com/2008/04/07/science/earth/07redwood.html?ref=us
Monday, April 7, 2008
Wednesday, January 30, 2008
Parametric Zoning Manifesto
The existing practice of city-wide zoning (originated in New York City in 1916 and exported around the world (witness the tower-on-a-base typology even in Dubai)) attempts to define architectural potential as a set of static parts - modular components. Rather than satisfying a range of possible conditions, the collection of zones repeatedly fails to produce the effects prioritized, even as new zones are generated. The ubiquity of the "special" portends this failure as zones lose any universal ability and become merely a lowest common denominator from which specialization can occur.
This ongoing project seeks to design zoning mechanisms capable of generating all prioritized effects. Success is satisfied when the zone is capable of generating its own specificity. To accomplish this, the strategy of parametrics is deployed. The field of possibility is dynamic - the logic of the system develops recursively. Feedback loops and corruption become part of the system, not foreign to it.
This ongoing project seeks to design zoning mechanisms capable of generating all prioritized effects. Success is satisfied when the zone is capable of generating its own specificity. To accomplish this, the strategy of parametrics is deployed. The field of possibility is dynamic - the logic of the system develops recursively. Feedback loops and corruption become part of the system, not foreign to it.
Thursday, November 29, 2007
ongoing research
Tuesday, November 20, 2007
15 minute randomized block
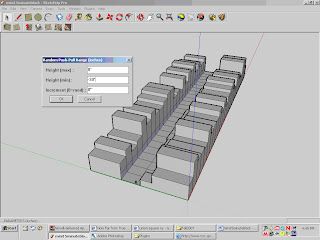
Parametric Zoning Envelope Columbia GSAPP
Mini-Tutorial.1 15-minute block
Topics: randomization, lot coverage, commercial overlay, city block
Scripts to load: IncRandomPushPull
All the geometry in this tutorial will be built from the rectangle tool.
We will start with the dimensions of a lot, copy that lot to make a full block, and then place randomized building envelopes on this field.
Using the rectangle tool, make a rectangle about 20’ by 90’. Copy that rectangle 24 times, being careful to snap the endpoints together (just copy once by holding down the control button with the Move tool and hitting “x 24” and the enter key afterwards)
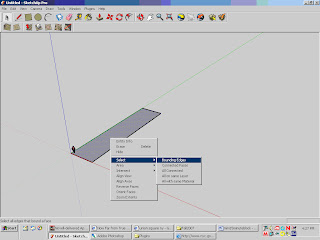
Once you have 25 lots lined up, copy that row of lots to make the other side of the block.
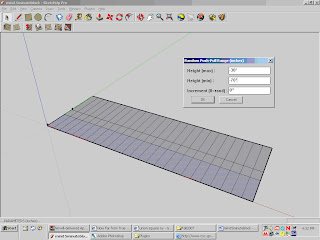
Make a rectangle about 60 feet deep and copy it across
Select all new rectangles (click each one with Shift key held down) and click open RandomPushPull function from Plugins
The PlugIn’s Z axis is upside down, so make sure to include the negative sign.
Now turn around to the back of the “buildings” to make first floors. On the back face of one building, make first story rectangle about 10’ in height. Copy across the others.
Delete any extra lines.
Select all first floor rectangles and apply RandomPushPull from 0 to -30’
Repeat same process on other half of block.
On the other side of the block, start again with 60’ deep rectangles, extrude randomly from 30’ to 70’. Then draw the 10’ first floor rectangle on the rear face and copy across, extruding all 0’ to 30’.
Select the first floors on either side of the block to extrude, since rear yard requirements don’t apply to corner lots. Extrude 20’ to 60’
Move each façade of corner lot envelopes to the rear lot line, to close off the block
Put 2 squares about 15’ x 15’ at each corner of the block, to establish dimension of sidewalk
Draw a rectangle from endpoint to endpoint to create 15 foot perimeter sidewalk
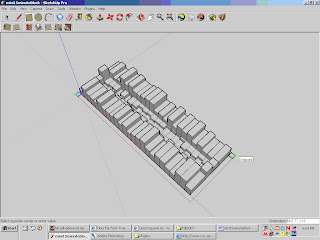
Does this look like a typical New York City block? Why or why not? Explain, how, using the same tools, a more realistic block could be generated. What steps in the above process would change?
Ruby script editor
Ruby script editor: http://ruby.about.com/gi/dynamic/offsite.htmzi=1/XJ&sdn=ruby&zu=http%3A%2F%2Fwww.scintilla.org%2FSciTE.html
(SciTE is a SCIntilla based Text Editor.)
(SciTE is a SCIntilla based Text Editor.)
FAR output to excel
Parametric Zoning Envelope Columbia GSAPP
Tutorial2 FAR xls
Topics: Microsoft Excel, FAR, sky exposure plane
Scripts to load: shapes.rb, Parametric.rb, model_report.rb, Grow.rb
Name your file FAR_yourname. (The model_report script will not work within an untitled file)
Create a box (from Draw -> Shapes -> Box) with dimensions Width 30’ Depth 50’ and Height 10’.
Using the control key with Move tool, Copy the box up 5 times (so that you have 6 floors total reaching 60’)
Select the top box and, using the Grow tool under Plugins, apply the following settings
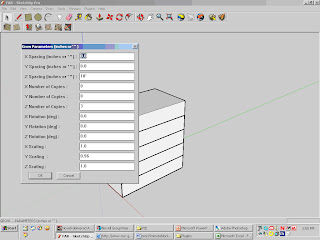
Be careful to reset default numbers to 0 where transformations are not being applied
Question: Which District envelope is this similar to now?
Make a plane 50’ x 65’ by Create Box with Height 0’.
Move the plane adjacent to the base of the first building and Explode it (right click).
Open Layers menu under Windows. Select Layer 0 and change the name to Floor.
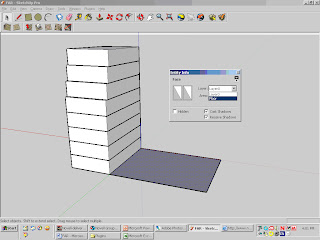
Right click on the plane to bring up its Entity Info window. Change Layer from Layer 1 to Floor layer.
Use the Rectangle tool to make a side wall between the first and second planes.
Select both the side wall and plane and make 5 copies up, snapping to the Endpoints of the adjacent building as a reference.
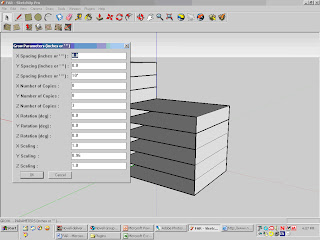
Again selecting both the sidewall and the top plane, Apply the Grow function to the top floor, just as we did the adjacent Box. The same settings will appear in the Grow window.
Under Tools, select Model Report. Select Excel as export format.
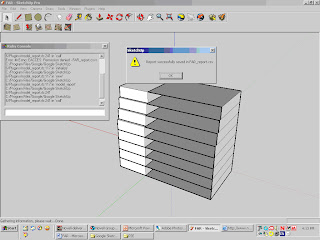
If the success message above does not appear, open the Ruby console and repeat the same procedure, then troubleshoot.
Open the Excel file. Can you find the total Floor Area? What additional data would you need to calculate FAR?
Tutorial2 FAR xls
Topics: Microsoft Excel, FAR, sky exposure plane
Scripts to load: shapes.rb, Parametric.rb, model_report.rb, Grow.rb
Name your file FAR_yourname. (The model_report script will not work within an untitled file)
Create a box (from Draw -> Shapes -> Box) with dimensions Width 30’ Depth 50’ and Height 10’.
Using the control key with Move tool, Copy the box up 5 times (so that you have 6 floors total reaching 60’)
Select the top box and, using the Grow tool under Plugins, apply the following settings

Be careful to reset default numbers to 0 where transformations are not being applied
Question: Which District envelope is this similar to now?
Make a plane 50’ x 65’ by Create Box with Height 0’.
Move the plane adjacent to the base of the first building and Explode it (right click).
Open Layers menu under Windows. Select Layer 0 and change the name to Floor.

Right click on the plane to bring up its Entity Info window. Change Layer from Layer 1 to Floor layer.
Use the Rectangle tool to make a side wall between the first and second planes.
Select both the side wall and plane and make 5 copies up, snapping to the Endpoints of the adjacent building as a reference.

Again selecting both the sidewall and the top plane, Apply the Grow function to the top floor, just as we did the adjacent Box. The same settings will appear in the Grow window.
Under Tools, select Model Report. Select Excel as export format.

If the success message above does not appear, open the Ruby console and repeat the same procedure, then troubleshoot.
Open the Excel file. Can you find the total Floor Area? What additional data would you need to calculate FAR?
Monday, November 19, 2007
Off-the-shelf scripts
Parametric
http://download.sketchup.com/downloads/downloads/rubyscripts/parametric.zip
Shapes
http://download.sketchup.com/downloads/downloads/rubyscripts/shapes.zip
Mesh_Additions
http://download.sketchup.com/downloads/downloads/rubyscripts/mesh_additions.zip
windows
http://download.sketchup.com/downloads/downloads/rubyscripts/windows.zip
Model_Report
http://www.crai.archi.fr/rubylibrarydepot/ruby/model_report.rb
IncRandomPushPull
http://www.crai.archi.fr/rubylibrarydepot/ruby/IncRandomPushPull.rb
Grow
http://www.crai.archi.fr/RubyLibraryDepot/Ruby/Grow.rb
ExtrudePath
http://www.crai.archi.fr/RubyLibraryDepot/Ruby/EM/ExtrudeAlongPath.rb
Subscribe to:
Comments (Atom)

